
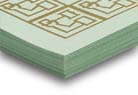
Die Press Finishing
Die Cutting
Provide a 3/8” gripper margin for all press sheets to be die cut, foil stamped or embossed.
Provide an additional 3/8” margin on the remaining three sides of the press sheet. Design your artwork to avoid using this 3/8” border.
Use the same gripper edge and side guide throughout the press run. The die press operator will use the same gripper edge and side guide to maximize the consistency of image registration.
Do not nest pieces unless the die will be created with the same nesting layout and all final knife trims can be made without cutting the other die-cut pieces.
Layout 2-up presentation folders in the same direction with each folder centered in its respective half of the press sheet.
Minimize the density of images that will be die cut, foil stamped or embossed.
Set the width of all glue tabs to 3/4”. Use of other glue tab widths may create a problem, so consult with us prior to finalizing your artwork.
Use a 1/8” or 3/16” bleed beyond the die-cut or kiss-cut edge of the piece to ensure correct registration.
Make allowances for the sheet-to-sheet misregistration that occurs with the digital printing process. Because color breaks and printed images are not consistent from sheet to sheet, the finished die press process (foil stamping, embossing and die cutting) will appear to have some movement.
Use digital measurements in your illustration software rather than “eyeing” placement of the die lines.
Convert all text to outlines (strokes) and make all elements 100% BLACK in color before transmitting digital artwork. Embedding fonts, rather than converting text to outlines, adds one more step to the process and can create font compatibility issues.
Do not trim either the gripper edge or side guide from the press sheets. We will trim your press sheet as needed prior to processing.
Offset printed sheets must be totally dry prior to die cutting. Wet ink on one sheet may cause offsetting on subsequent sheets. To ensure the quality of a die cutting order, additional dry time may be necessary.
Provide additional stock for setup.
Use a stock with a finish and texture that enhances the reflective properties of the foil. Remember, the more calendered the stock, the better the reflective properties will be. Cast coated stocks are the best when high reflection is required.
Provide a 3/8” gripper margin for all press sheets to be die cut, foil stamped or embossed.
Provide an additional 3/8” margin on the remaining three sides of the press sheet. Design your artwork to avoid using this 3/8” border.
Use the same gripper edge and side guide throughout the press run. The die press operator will use the same gripper edge and side guide to maximize the consistency of image registration.
Do not nest pieces unless the die will be created with the same nesting layout and all final knife trims can be made without cutting the other die-cut pieces.
Layout 2-up presentation folders in the same direction with each folder centered in its respective half of the press sheet.
Minimize the density of images that will be die cut, foil stamped or embossed.
Make allowances for the sheet-to-sheet misregistration that occurs with the digital printing process. Because color breaks and printed images are not consistent from sheet to sheet, the finished die press process (foil stamping, embossing and die cutting) will appear to have some movement.
Use digital measurements in your illustration software rather than “eyeing” placement of the die lines.
Convert all text to outlines (strokes) and make all elements 100% BLACK in color before transmitting digital artwork. Embedding fonts, rather than converting text to outlines, adds one more step to the process and can create font compatibility issues.
Do not trim either the gripper edge or side guide from the press sheets. We will trim your press sheet as needed prior to processing.
Offset printed sheets must be totally dry prior to mylar foil stamping. The adhesive on the foil may not adhere to the sheet due to wet ink. To ensure the quality of a foil stamp order, additional dry time may be necessary.
Digitally printed sheets must be free of un-fused toner and excessive fuser oils. The foil adhesives only work when clean and dry paper fiber is contacted.
Provide additional stock for setup.
Communicate the type and weight of stock you will be using, so we can cut the best bevel angle for the embossing/debossing die.
Choose a stock manufactured with long paper fibers when a deeper than normal emboss/deboss is desired.
Provide a 3/8” gripper margin for all press sheets to be die cut, foil stamped or embossed.
Provide an additional 3/8” margin on the remaining three sides of the press sheet. Design your artwork to avoid using this 3/8” border.
Use the same gripper edge and side guide throughout the press run. The die press operator will use the same gripper edge and side guide to maximize the consistency of image registration.
Do not nest pieces unless the die will be created with the same nesting layout and all final knife trims can be made without cutting the other die-cut pieces.
Layout 2-up presentation folders in the same direction with each folder centered in its respective half of the press sheet.
Minimize the density of images that will be die cut, foil stamped or embossed.
Make allowances for the sheet-to-sheet misregistration that occurs with the digital printing process. Because color breaks and printed images are not consistent from sheet to sheet, the finished die press process (foil stamping, embossing and die cutting) will appear to have some movement.
Use digital measurements in your illustration software rather than “eyeing” placement of the die lines.
Convert all text to outlines (strokes) and make all elements 100% BLACK in color before transmitting digital artwork. Embedding fonts, rather than converting text to outlines, adds one more step to the process and can create font compatibility issues.
Do not trim either the gripper edge or side guide from the press sheets. We will trim your press sheet as needed prior to processing.
Provide additional stock for setup.
When Kiss Cutting, choose a label stock with a release liner that is at least .004 thick. The thicker the liner, the better we can minimize liner cut-through.
Provide a 3/8” gripper margin for all press sheets to be die cut, foil stamped or embossed.
Provide an additional 3/8” margin on the remaining three sides of the press sheet. Design your artwork to avoid using this 3/8” border.
Use the same gripper edge and side guide throughout the press run. The die press operator will use the same gripper edge and side guide to maximize the consistency of image registration.
Do not nest pieces unless the die will be created with the same nesting layout and all final knife trims can be made without cutting the other die-cut pieces.
Minimize the density of images that will be die cut, foil stamped or embossed.
Use a 1/8” or 3/16” bleed beyond the die-cut or kiss-cut edge of the piece to ensure correct registration.
Offset printed sheets must be totally dry prior to tip-in tape application. The tip-tape adhesive may not adhere to the sheet due to wet ink. To ensure the quality of a tab order, additional dry time may be necessary.
Make allowances for the sheet-to-sheet misregistration that occurs with the digital printing process. Because color breaks and printed images are not consistent from sheet to sheet, the finished die press process (foil stamping, embossing and die cutting) will appear to have some movement.
Use digital measurements in your illustration software rather than “eyeing” placement of the die lines.
Convert all text to outlines (strokes) and make all elements 100% BLACK in color before transmitting digital artwork. Embedding fonts, rather than converting text to outlines, adds one more step to the process and can create font compatibility issues.
Do not trim either the gripper edge or side guide from the press sheets. We will trim your press sheet as needed prior to processing.
Digitally printed sheets must be free of un-fused toner and excessive fuser oils. The tip-in tape adhesives only work when clean and dry paper fiber is contacted.
Avoid heavy ink coverage if the tab extension will be laminated. Poor adhesion, cloudiness and bubbling may result.
Provide additional stock for setup.
When Peforating or Creasing, choose a perforation tooth pattern that is appropriate for the stock and project. Using a microperf (32 teeth) pattern on an 80# cover weight stock may result in a premature separation of the perforated piece. Carefully select a stock when it will be UV coated over a dark ink, black or blue, as this coating/ink combination has a tendency to crack when creased and folded.
Provide a 3/8” gripper margin for all press sheets to be die cut, foil stamped or embossed.
Provide an additional 3/8” margin on the remaining three sides of the press sheet. Design your artwork to avoid using this 3/8” border.
Use the same gripper edge and side guide throughout the press run. The die press operator will use the same gripper edge and side guide to maximize the consistency of image registration.
Do not nest pieces unless the die will be created with the same nesting layout and all final knife trims can be made without cutting the other die-cut pieces.
Layout 2-up presentation folders in the same direction with each folder centered in its respective half of the press sheet.
Provide additional stock for setup.
When Peforating or Creasing, choose a perforation tooth pattern that is appropriate for the stock and project. Using a microperf (32 teeth) pattern on an 80# cover weight stock may result in a premature separation of the perforated piece. Carefully select a stock when it will be UV coated over a dark ink, black or blue, as this coating/ink combination has a tendency to crack when creased and folded.
Indicate the hole diameter and center-to-center spacing required for drilling.
Provide a 3/8” gripper margin for all press sheets to be die cut, foil stamped or embossed.
Provide an additional 3/8” margin on the remaining three sides of the press sheet. Design your artwork to avoid using this 3/8” border.
Use the same gripper edge and side guide throughout the press run. The die press operator will use the same gripper edge and side guide to maximize the consistency of image registration.
Do not nest pieces unless the die will be created with the same nesting layout and all final knife trims can be made without cutting the other die-cut pieces.
Layout 2-up presentation folders in the same direction with each folder centered in its respective half of the press sheet.
Provide additional stock for setup.
Regardless of hand or automated gluing, set the width of all glue tabs to 3/4”. Use of other glue tab widths may create a problem, so consult with us prior to finalizing your artwork.
Knock out all UV coating on glue tabs, as adhesives will not stick to on this coating.
Digitally printed sheets must be free of un-fused toner and excessive fuser oils. The adhesive transfer tape adhesives only work when clean and dry paper fiber is contacted.
Provide additional stock for setup.
Regardless of hand or automated gluing, set the width of all glue tabs to 3/4”. Use of other glue tab widths may create a problem, so consult with us prior to finalizing your artwork.
Knock out all UV coating on glue tabs, as adhesives will not stick to on this coating.
Provide additional stock for setup.